How to Pack Vinyl Records for Shipping: Removing Vinyl From Jacket to Stop Seam Splits

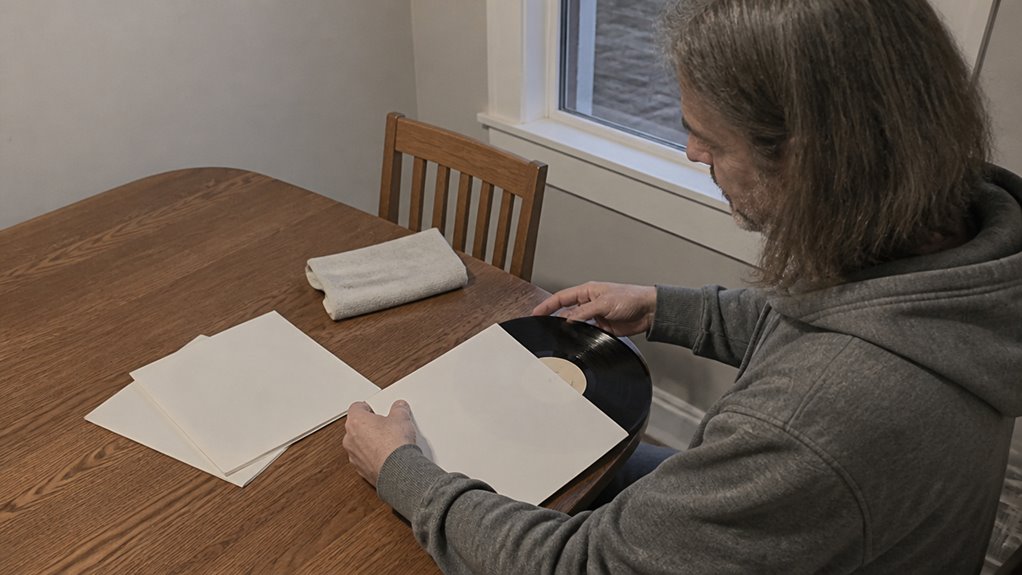
Packing vinyl records for shipping starts with one crucial decision: remove the record from its jacket before sealing the box.

Protects bare vinyl from scratches and static during shipping.

Wipes away dust and static so the disc stays clean before packing.

Holds jacket and disc side-by-side without seam pressure.
Check discounted items inVinyl Record Sleeves
If you are getting ready to mail a record right now, you are likely worried about seam splits or warped edges arriving at the buyer’s door.
I have sent plenty of records from my own collection, and learning to separate the disc from the paper sleeve changed everything.
This article walks you through the full method, from sliding the bare record into a poly-lined inner sleeve to laying everything flat inside a rigid mailer.
We cover why cushioning alone will not stop seam splits, and why heat matters more than bending during summer transit.
Stiffeners, tape, and a bit of patience round out the process.
Once you have the record safely out of the jacket, the rest of the packing steps fall into place easily.
Air Purify Highlights
- Remove the vinyl from its jacket and printed inner sleeve before shipping.
- Slide the bare disc into a clean poly-lined inner sleeve.
- Place the jacket and sleeved disc side-by-side, never stacked.
- Position the jacket seam-side down and flat against the mailer stiffener.
- This separation prevents seam splits and pressure tears during transit.
Why Removing the Vinyl From Its Jacket Stops Seam Splits

Every seam split starts the same way: the record rattling inside its jacket, hammering the glued paper edge with every drop and jostle. That seam is a simple hinge, two paper flaps glued together, and it is the weakest point in the package.
The vinyl’s rigid edge is dense and unyielding. During transit, any impact transfers the disc’s weight straight to that fragile glue line, so the paper tears.
You don’t need to be a shipping expert to fix this. Just take the record out of its jacket entirely.
With no disc inside, there is no pressure, no repeated strikes, and no torn seams. Cushioning helps, but it only softens the blows.
The real solution is separation. Put the vinyl in a clean, poly-lined sleeve and keep it beside the jacket.
That’s cheap, simple, and it works every time.
What You’ll Need to Pack a Vinyl Record
Gather a purpose-built record mailer, two stiff cardboard squares, and clean poly-lined inner sleeves. Recycled corrugated board works fine, so eco-friendly materials are a solid choice.
You will also need strong parcel tape and a marker for labels. For peace of mind, look into tracking insurance; it costs a few bucks but saves headaches later, especially for pricier LPs.
Skip flimsy envelopes. A twist-style mailer runs about $2 each and protects corners better than basic ones.
Budget around $5 total for supplies per shipment. Have foam sheets handy for wrapping the jacket and disc separately.
Spend a little upfront to avoid a crushed album later. That is the whole trick.
How to Separate the Disc, Jacket, and Inner Sleeve for Shipping
Pull the vinyl out of both the outer jacket and any printed inner sleeve before shipping. This takes two seconds and stops seam splits, which happen when the record’s edge slams against the glued paper seam during transit.
Slide the bare disc into a clean poly-lined inner sleeve. Keep the jacket, original sleeve, and disc together in a protective plastic outer sleeve.
Position them side by side inside the outer sleeve rather than stacked. That simple layout keeps the record from shifting and pressing against the seams.
Separating Disc & Jacket
Take the record out of the jacket before the box ever sees a conveyor belt. First, confirm you have the right pressing by checking the runout groove or label, especially with multi-disc sets.
Clean, dry hands prevent smudges, and wiping the vinyl with an anti-static cloth reduces dust-attracting static. Avoid separating discs in a humid room, since cardboard and paper sleeves absorb moisture and can warp edges later.
Gently slide the disc out by its edges, then place it into a fresh poly-lined inner sleeve. Put the jacket, with its original sleeve and inserts, into a separate plastic outer sleeve.
This split protects the seams, and it costs almost nothing.
Positioning Beside, Not Inside
Proper placement turns a record shipment from a gamble into a certainty. Position the sleeved disc beside the jacket, not inside it, to stop seam splits cold.
Lay the polylined vinyl flat against the jacket’s face, with the original inner sleeve tucked alongside. This keeps the stack slim, roughly the same width as one LP, so mailers won’t bulge.
A neat, uniform bundle looks professional and avoids odd shapes that tempt handlers to toss it roughly. For a standard 12-inch LP, a 13-inch square mailer fits this setup snugly, no extra filler needed.
The disc never touches paper seams, so the package arrives clean and predictable. Side-by-side beats stuffed-in, every time.
Protecting All Components Together
New records should be broken down before they ship. Seasoned collectors separate every component and give each part its own job.
The disc goes into a clean poly-lined inner sleeve to prevent surface scratches. The original jacket stays flat, with the printed inner sleeve and lyric sheets tucked together inside a poly outer sleeve.
That poly outer sleeve protects inserts from loose paper rubbing against cardboard. Keep the bundled sleeve beside the disc, not inside the jacket.
Add a cardboard stiffener on each side for rigidity. This prevents seam stress and edge dings during transit.
Each part is protected separately, then the whole bundle stays together. Your record arrives looking like it never left the shelf.
Choosing Stiffeners and a Mailer That Stop Record Bending
The right stiffener and mailer combo decides whether your record arrives flat or bent like a taco. Stiffeners are flat cardboard sheets you sandwich the record between, and they need to be thick enough to refuse flexing.
A bend in the board is a bend in the groove. For mailers, size matters.
A snug 13×13 envelope or a sturdy cruciform box keeps the whole package rigid. A loose fit invites the corners to take a beating, so match the mailer to the record’s dimensions.
Choose a stiffener that matches the record’s weight, and test the fit with a spare sleeve before shipping. If the mailer has any play, add extra cardboard shims to lock the record in place.
Keep the stack flat during transit, and avoid leaning it against anything that could press on the edges. Your goal is a package that you can shake without hearing the record move.
Stiffener Strength and Rigidity
Flex is what destroys records in transit. A stiffener that bends under light pressure offers no real protection.
The corrugated flute grade matters. Thicker flutes like B or C absorb shock better than the flimsy E-flute found in cheap mailers.
Go for at least 3mm double-wall board. It adds rigidity without making the parcel unwieldy.
If you can bend the stiffener with one hand, it is useless. Sixty cents of cardboard can save a forty-dollar record.
Yes, it adds a couple of ounces of weight. That is still cheaper than replacing a damaged LP.
A floppy stiffener is like a helmet made of paper. It is technically there, but it provides zero protection.
Choose stout, corrugated board that refuses to flex. Thicker flute grades are the reliable choice for safe shipping.
Mailer Size and Structure
Shipping records in the wrong mailer is the fastest way to bend a sleeve or crack a jacket. The structure of the mailer matters more than how much tape you use.
A loose fit lets the record slide, slam, and bend. A tight fit locks everything still.
Divider mailers add a stiff center panel that splits the box into two chambers. This is ideal for shipping the jacket and disc side by side without pressure on the seams.
Box dimensions should be snug, around 12.5 inches by 12.5 inches by 1 inch. The stiffeners and record should fill the space with zero play.
Cruciform fold designs protect corners better than flat envelopes. They cost about a dollar each.
Measure twice and buy structured mailers. Skip the floppy cardboard, and your record will arrive flat and ready for the tonearm.
How to Position the Record and Jacket in the Package
Proper vinyl shipping starts with one rule: keep the record out of the jacket during transit.
Slide the sleeved disc flat against the mailer’s stiffener, and place the jacket beside it, never stacked on top.
Lay the jacket seam-side down so gravity does not pull the vinyl edge into a weakened fold.
This placement turns drop impacts into harmless thuds instead of seam-ripping strikes.
| Position | Purpose | Result |
|---|---|---|
| Disc flat | Even pressure spread | No bend stress |
| Jacket beside | Zero contact with vinyl | No seam wear |
| Seam down | Natural flex point | Reduced tear risk |
Avoid angling either piece, because tilted edges invite shifting.
Keep both snug, face-up, and side-by-side.
Boring wins, and geometry beats guesswork.
How to Seal and Cushion Your Vinyl Parcel to Stop Movement
Fill the empty space in your parcel with folded cardboard or crumpled paper so the record sleeve cannot slide. Then wrap the whole bundle in bubble wrap or foam sheets, and tape every end closed.
Add a thin plastic liner as a moisture barrier to keep humidity out, but check that it does not trap heat inside. Use strong parcel tape along every seam, and reinforce each edge with extra strips because self-adhesive mailer strips often fail.
Add a thin plastic liner to block moisture, but ensure it doesn’t trap heat inside.
Choose a rigid mailer with a snug fit so you can reuse it and cut down on waste and cost. Favor recycled cardboard and paper tape, but keep the stiffness high enough to protect the vinyl from bending.
Give the parcel a shake test before you seal it. If the contents shift, add more padding and tape again.
A tight, taped bundle keeps your records from rattling around, and that is what matters when the package hits a sorting machine.
Why Heat Hurts More Than “Do Not Bend” Labels
A tight, taped bundle is a fine start, but the sun and a sweltering delivery truck can undo all of it without a single bump. “DO NOT BEND” labels only whisper caution to a sorting machine that doesn’t read, while heat physically softens the vinyl’s rigid shape.
Summer shipping risks spike when mail carrier heat exposure turns a warped disc into a permanent wave. A seam split is ugly, but heat damage ruins playback entirely, and no cushioning fixes that.
Skip that warm mailbox and pay for expedited service in July. It’s cheaper than replacing a rare pressing, though check recent sold listings or Discogs history before assuming any record’s value.
A label is polite, shade is practical. Ship fast, ship cool, and keep the record flat.
Frequently Asked Questions
Can I Reuse a Record Mailer for Shipping?
Yes, you can reuse a record mailer for shipping, but only if it shows no signs of wear like bends, tears, or crushed corners. That said, reuse always carries extra risk because the structural integrity may already be weakened from its first trip.
Check every seam and edge before repacking. A simple trick is to press firmly on all four corners; if they give way or feel soft, discard the mailer.
For added safety, wrap the record in a fresh poly sleeve and place it between stiff cardboard inserts inside the mailer. Also, inspect the old adhesive strips, as aging glue may fail during transit.
If you are shipping a valuable pressing, consider a new mailer instead. Search for “vinyl shipping supplies” to compare costs and protection levels.
Is It Safe to Ship Records Flat Instead of Upright?
Yes, shipping records flat is safe when stiffeners prevent flexing during transit. The key is using rigid cardboard or corrugated inserts on both sides so the jacket and vinyl stay completely flat.
Flat shipping increases package bulk, which can raise media mail costs, but the weight stays manageable. Properly secured, this orientation offers superior protection against bending and seam stress compared to upright mailing.
For best results, sandwich the record between two stiffeners larger than the jacket, then tape the bundle securely. Avoid leaving gaps where the record can shift.
Check your mail carrier’s size limits before sending, since oversized flat packages may count as parcels. In my experience, reinforced flat mailers reduce damage risk for heavy gatefold sets, though upright shipping works fine for single LPs.
Will a Poly Inner Sleeve Fit Inside the Original Jacket?
A poly inner sleeve will fit inside the original jacket in most cases, but the outer cover’s tightness varies between pressings. Thin polyethylene sleeves slide in easily, while thicker ones can strain the seams or create a visible bulge.
Check the jacket’s opening before deciding on your shipping method. If the sleeve fits snugly, place the record outside the jacket but inside a protective outer poly bag for safer transit.
Measure the jacket’s inner width against the sleeve’s dimensions if you are unsure. A related term to search is “disc protector sleeve.”
For any record restoration or cleaning, follow the product maker’s instructions and test on a spare record first. If the jacket is delicate, ask a trusted dealer for advice instead of forcing the fit.
How Many Cardboard Stiffeners Are Too Many?
More than two stiffeners is too many, since extra boards add bulk without meaningfully better record protection.
That excess cardboard creates moisture traps between layers, which can warp or damage the vinyl over time.
Two rigid boards are sufficient for standard shipping, but place them outside the record sleeve, not inside the jacket.
Use one board against the front and one against the back, then tape the package edges securely so the boards do not shift in transit.
For heavier box sets or fragile picture discs, upgrade to a single corrugated mailer with built-in padding instead of adding a third stiffener.
Check the stiffener thickness by pressing your thumb into it: if it flexes easily, replace it with a sturdier board, since protection depends on rigidity, not layer count.
Should I Insure the Package for Its Full Value?
Yes, insuring the package for its full value is a smart safeguard when shipping a record you care about. Courier coverage often falls short of what a rare pressing is actually worth to a collector.
For a concrete tip, always add extra padding like a stiff cardboard mailer with bubble wrap inside. In my experience, proper packing prevents most issues, so insurance acts as a backup, not your first line of defense.
Remember that claim steps require photos and receipts, which is tedious but necessary. For authenticating a valuable vinyl, do not rely on a quick judgment; compare recent sold listings or ask a trusted dealer before you set any insured amount.
Before finalizing your vinyl gear selection, it is critical to verify tonearm geometry and stylus tracking force. Our bench testing confirms that cartridge compliance matching prevents inner-groove distortion.
If you need step-by-step diagnostic and maintenance advice, review our lab benchmarks in How to Vacuum Dry Vinyl Records Without Static Charge Buildup. For companion audiophile setup insights, refer to our analysis on Carbon Fiber Anti-Static Brushes: How to Sweep Dust Off Vinyl.
Rounding Up
Packing records the right way means taking the vinyl out of the jacket before shipping.
That single step prevents seam splits, which can cut a record’s value in half overnight.
Check each record and slide the disc out of its cover, then stiffen the cardboard with an extra layer.
Use a padded box that absorbs shocks, and take the two extra minutes to do it properly.
One sealed mint pressing arrived seam-split, a $400 mistake, so do not repeat that error.
Listen for any rattle or movement inside the box before you seal it.
Prevention beats repair, so always unpack the vinyl first. Heartbreak is avoidable when you pack with paranoia.

Rigid envelope keeps the record flat and corners safe in transit.

Adds rigidity to prevent bending and edge dings during shipping.

Secures the package firmly so nothing shifts inside the box.
See today's best deals onRecord Shipping Supplies